As an Amazon Associate, we earn from qualifying purchases. Some links may be affiliate links at no extra cost to you. Although our opinions are based on curated research, we haven't used these products. Articles generated with AI.

Reducing Latency In USB Audio Recording
Reducing latency in USB audio recording is essential for quality sound. We can achieve this by choosing interfaces like the Focusrite Scarlett 2i2, known for low latency. Utilizing lightweight drivers like ASIO can greatly improve performance as well. Additionally, optimizing buffer sizes strikes a balance between latency and system stability; smaller sizes work well for recording, while larger sizes suit mixing. With the right techniques, we can guarantee smoother recording sessions, and there’s even more to explore on this topic.
Key Takeaways
- Use efficient drivers like ASIO to bypass unnecessary OS layers and significantly reduce latency during USB audio recording.
- Opt for smaller buffer sizes (64 to 128 samples) to minimize latency, but monitor CPU load to prevent audio glitches.
- Choose USB-C audio interfaces for faster data transfer rates, which can help lower latency in recordings.
- Prioritize audio threads in your computer’s processor scheduling settings to enhance performance and reduce delays.
- Regularly update drivers and firmware to ensure optimal hardware compatibility and minimize latency issues.
Understanding Latency in USB Audio Recording
You may be interested


When we plunge into USB audio recording, one of the first concepts we encounter is latency. Latency is the delay between the input and output of audio signals, and it can greatly impact audio synchronization. For instance, a latency measurement over 10 milliseconds can become noticeable, causing frustrating timing issues during recordings.
Several factors contribute to latency, including audio drivers, buffer size, and CPU power. Efficient drivers like ASIO can help reduce this delay, while smaller buffer sizes can lower latency but may lead to glitches. Understanding these elements is essential for achieving high-quality recordings. So, let’s keep latency in check to guarantee our recordings sound as polished as possible, enhancing the overall audio experience.
Choosing the Right Audio Interface
Selecting the right audio interface is essential for achieving ideal performance in USB audio recording. We need to take into account key audio interface features, such as USB-C connectivity, which offers faster data transfer, reducing latency considerably. For those of us recording solo or podcasting, an interface like the Focusrite Scarlett 2i2 provides two inputs and outputs, delivering balanced latency performance. If we’re handling multiple instruments, a model like the Behringer UMC404HD, with four inputs, offers great input/output flexibility, though it may introduce slight latency due to processing. Finally, high-quality preamps are essential for capturing clear sound, ensuring low noise and distortion, which is critical for real-time monitoring and minimizing latency artifacts during recording. Additionally, opting for high-resolution recording capabilities can significantly enhance the overall audio fidelity.

2026 Newly Upgraded Wireless CarPlay & Android Auto Adapter Pro - 10 Core Advantages to Unlock Wireless In-Car Freedom Easily
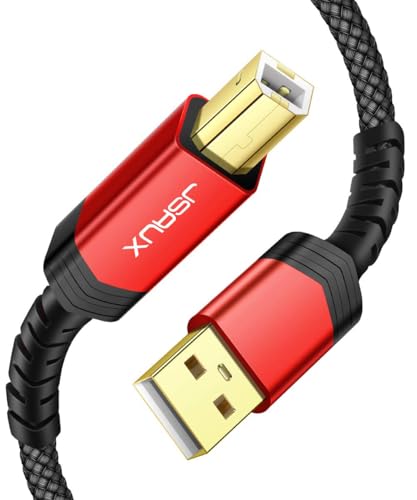
【Universal Printer Cable】: JSAUX USB 2.0 Printer Cable is ideal for connecting your scanner, printer, server, camera such as HP, Canon, Epson, Dell, Brother, Lexmark, Xerox , Samsung and other usb b devices to a laptop, computer (Mac/PC) or other USB-enabled device.

USB-C to USB-B Audio & Peripheral Cable – Connects USB-B devices like DJ controllers, audio interfaces, MIDI gear, printers, and scanners to modern USB-C laptops.
Importance of Driver Optimization
Optimizing drivers is a key component in achieving low-latency USB audio recording, especially after choosing the right audio interface. By adjusting driver settings, we can greatly enhance our audio performance. For instance, setting processor scheduling to “Background service” prioritizes our audio driver threads, reducing latency risks. Disabling USB power-saving options prevents device disconnects that lead to glitches. Additionally, using lightweight drivers like ASIO helps bypass unnecessary OS layers, leading to faster audio processing. Regular updates guarantee our drivers remain compatible with the latest system changes. By managing these aspects, we can create a stable, responsive environment for our recordings, ultimately achieving the clarity and precision we aim for in our audio projects.

Hybrid Bone+Air Conduction Driver System: Psier Swimming headphones features dual driver-bone conduction and air conduction technology to deliver more clear highs and deep power bass sound. Compare with other regular bone conduction headphones, our headphones imporve more than 30% deep bass sound, makes your more enjoy immersive. Perfect for underwater headphones for swimming, the sound quality remains uncompromised, even in challenging environments.

【Wi-Fi 6E】With Intel Wi-Fi 6E technology network adapter provides strong performance and good compatibility, while reducing power consumption and improving service life.

🏆【REVOLUTIONARY MINI DESIGN & MAXIMUM INTEGRATION】Preserve your car's clean interior aesthetics.It plugs directly into your designated USB port and virtually disappears. Forget about added dashboard clutter or awkward mounts; no extra installation needed. This tiny powerhouse delivers full wireless functionality while remaining almost invisible, ensuring your tech upgrade enhances, rather than detracts from, your vehicle's original design.The HEYINCAR+ H-Air2.0 wireless CarPlay adapter fits almost flush in your car’s USB port, blending seamlessly into your vehicle’s interior for a clean, minimalist look without clutter.
Managing Buffer Size Effectively
Achieving the right buffer size can greatly impact our USB audio recording experience. When we consider buffer size, we face important trade-offs between latency and system stability. Smaller buffer sizes, like 64 to 128 samples, can minimize latency, making them ideal for recording. However, they also increase CPU load, raising the risk of audio glitches. Conversely, larger sizes, such as 512 samples, provide stability for mixing but can introduce noticeable delays. We should adjust buffer size based on our current task: recording demands lower sizes for tight synchronization, while mixing allows for larger sizes to reduce strain. By carefully managing these buffer size considerations, we can enhance our recording sessions without compromising performance.
![[5000+ Official-Apps & AI Auto Focus & 50W Dolby Audio] Outdoor-Projector-4k with WiFi and Bluetooth, AI Movin 2.0 OS Smart Projector with HDR10+, Lisowod Portable 4K Proyector 2026 Upgraded](https://m.media-amazon.com/images/I/51aFLjcJwiL._SL500_.jpg)
[Smart Projector with Movin 2.0 OS - New Home Entertainment is Here] Powered by the exclusive AI Movin 2.0 OS and a quad-core A55 processor, the Lisowod L61Pro projector delivers 75% faster app launches and smoother navigation than standard 1080P projectors. Immerse yourself in true 4K decoding with HDR10+ for breathtaking clarity and Hollywood-grade color contrast on massive 300-inch screens. All popular apps are pre-installed for instant entertainment without extra devices. Dual-band WiFi, Bluetooth 5.2, and built-in 50W Dolby stereo speakers provide a seamless, lag-free experience at home or outdoors.
USB C to B Printer & MIDI Cable: USB B to USB C printer cable supports connected printers, scanners, fax machines, as well as most audio equipment. Connect to Yamaha keyboards, BOSS guitar amps, DAC converters, and DJ controls.

【Universal Printer Cable】: JSAUX USB 2.0 Printer Cable is ideal for connecting your scanner, printer, server, camera such as HP, Canon, Epson, Dell, Brother, Lexmark, Xerox , Samsung and other usb b devices to a laptop, computer (Mac/PC) or other USB-enabled device.
Sample Rate Implications on Latency
When it comes to USB audio recording, the sample rate plays an essential role in determining latency. A higher sample rate reduces latency, as more samples are processed per second. For example, using a buffer of 512 samples at 44.1 kHz results in approximately 11.6 ms latency, while at 96 kHz, it drops to about 5.3 ms. However, we must also consider the increased CPU workload and larger file sizes associated with higher sample rates, which can strain our systems. For most recording scenarios, sticking to 44.1 kHz or 48 kHz balances manageable latency with recording quality. Ultimately, selecting the right sample rate is vital for achieving the best performance in our audio projects.
Optimizing Your Computer System
To achieve the best performance in USB audio recording, a well-tuned computer system is essential. We should start by disabling USB selective suspend, ensuring our audio interfaces remain active during recording. Setting our processor power management to 100% minimizes latency and maximizes system performance. Let’s also configure system cooling to active, preventing CPU throttling.
It’s crucial to maintain at least 20% free disk space and use SSDs for faster read/write speeds. We must regularly update drivers and firmware, avoiding generic options for ideal hardware configuration. Additionally, closing unused applications frees up valuable resources. By assigning higher priority to our DAW in Task Manager, we’re enhancing real-time audio processing reliability. With these adjustments, we can appreciably reduce latency.
Simplifying Your Signal Chain
By minimizing the components in our signal chain, we can greatly reduce latency and enhance audio quality. A streamlined signal path limits processing stages, cutting down on cumulative latency and potential noise. For instance, using direct connections between our audio source and interface can minimize signal travel time, ensuring clarity and integrity.
When selecting components, we should prioritize high-quality signal conditioners that maintain performance at USB speeds. Avoiding unnecessary effects or processors helps preserve audio quality while reducing the risk of electrical interference. By focusing on efficient component selection and direct coupling, we create a cleaner, faster signal chain that greatly boosts our recording experience. Ultimately, a simplified approach leads to better sound with less hassle.
Utilizing Direct Monitoring Techniques
There’s something undeniably powerful about hearing your performance in real time, and that’s exactly what direct monitoring offers us. By routing the analog signal directly to our headphones or speakers, we avoid the delays that come from digital conversion. This method provides zero or near-zero latency, essential for staying in sync during recording sessions.
Many audio interfaces, like those from Focusrite or PreSonus, come equipped with a direct monitor feature, simplifying our setup. We can even balance the direct input with playback using a mix knob, giving us the best of both worlds. Whether we’re recording vocals or instruments, direct monitoring enhances our timing and overall recording experience, ensuring our performance shines without distraction.
Advanced Tips for Reducing Latency
Achieving near-zero latency is just one part of the equation; optimizing our recording setup can greatly enhance our audio experience. One effective strategy involves adjusting buffer size settings. We should aim for smaller buffers, typically between 64 and 256 samples, to minimize latency while balancing CPU load.
Additionally, increasing our sample rate to 88.2 kHz or 96 kHz can considerably reduce latency, though it demands more processing power.
Implementing advanced monitoring techniques, like direct monitoring, keeps us in sync with our recordings.
Finally, adopting plugin management strategies—such as disabling real-time effects during tracking—can further clear our processing load. By fine-tuning these elements, we create a smoother recording experience with minimal latency.
Frequently Asked Questions
What Is the Ideal Buffer Size for Live Performances?
Imagine sailing smoothly through calm waters; we’ve found that an ideal buffer size for live performances lies between 128 and 512 samples. This balance optimizes performance, ensuring our musical journey remains glitch-free and enjoyable.
How Do Plugins Affect Audio Latency During Recording?
When we consider plugins’ impact on audio latency during recording, effective latency management becomes essential. Complex plugins can introduce noticeable delays, so we should prioritize zero-latency options for smoother recording experiences and better synchronization.
Can I Use Multiple Audio Interfaces Simultaneously?
They say two heads are better than one, and we can use multiple audio interfaces simultaneously. However, we need to guarantee audio interface compatibility for a smooth multi-device setup, especially on Windows where challenges arise.
Is Lower Latency Always Better for Audio Quality?
When discussing audio quality, we should debunk latency myths. While lower latency improves our responsiveness during recording, it doesn’t inherently enhance audio perception. Stability often matters more than aiming for ultra-low latency in our sessions.
How Can I Troubleshoot Persistent Latency Issues?
How often do we overlook simple fixes for persistent latency issues? By monitoring our latency and adjusting audio interface settings, we can isolate problems and enhance our recording experience. Let’s explore effective troubleshooting together!