As an Amazon Associate, we earn from qualifying purchases. Some links on this site are affiliate links at no extra cost to you. Our recommendations are based on thorough research and editorial judgment.

Shooting In Harsh Sunlight Tips

To tackle shooting in harsh sunlight, we should start by positioning our subjects with the sun behind them. This technique minimizes unflattering shadows. We can also use reflectors or diffusers to soften light and enhance detail. Experimenting with angles can create dynamic perspectives. It’s essential to adjust exposure settings, aiming for a lower ISO and faster shutter speed to prevent blown highlights. By employing these approaches, we’ll improve our outdoor portraits, revealing more techniques that enhance our results.
Key Takeaways
- Position subjects with the sun behind them to minimize harsh shadows and create a more flattering light.
- Use diffusers to soften sunlight and reduce harsh contrasts for better skin tones.
- Incorporate natural shade, like trees or buildings, to achieve even lighting on your subjects.
- Utilize reflectors to fill in shadows and enhance details, improving overall image quality.
- Manually adjust exposure settings to prevent blown highlights; aim for an ISO of 100 and a shutter speed around 1/500s.
Understanding Harsh Sunlight Challenges
You may be interested



When we step outside to capture images in bright sunlight, we often encounter a unique set of challenges that can complicate our photography. High light intensity creates extreme contrast, making exposure balance tricky. We might find that harsh sunlight emphasizes skin imperfections, leading to distracting shadows on our subjects’ faces. This uneven lighting can wash out natural skin tones and introduce awkward color casts, particularly if surroundings reflect colors onto our subjects.
Additionally, our cameras may struggle to capture the full tonal range, resulting in clipped highlights or shadows. To overcome these issues, we should be aware of our camera’s limitations and consider using techniques like bracketing or post-processing to manage exposure effectively in harsh conditions.
Positioning and Angling Techniques
To effectively capture stunning images in harsh sunlight, we need to be strategic about how we position our subjects and angle our cameras. For subject positioning, placing the subject with the sun behind them helps avoid harsh shadows and squinting. We can angle their body slightly toward the sun for interesting contours while keeping their face well-lit.
When it comes to camera angles, shooting from a lower angle tilted upward adds dynamic perspective. Incorporating props like leaves or hands can create depth, enhancing the overall composition. By adjusting subject posture, we can control shadows and achieve a balanced look, ensuring that our images pop, even in challenging lighting situations.
Recommended Products

【Light Diffuser】SUPON light diffuser is is making the light softer and more uniform, creating a soft natural lighting effect. Good for portrait, children photography and online product photography.

Easy to Use -- Within Two Comfortable Grips on The Reflector, Allowing You to Use it with Just One Hand. Provide Better Experience Than Traditional Reflector.

39x39"/ 100x100cm reflector panel consists of a detachable aluminium frame that can be easily assembled in moments, it is a lightweight and easily assembled light modifier ideal for location photography and video recording.
Utilizing Shade and Diffusers

While we often think of bright sunlight as ideal for photography, it can lead to harsh shadows and overexposed highlights. One effective way to combat this is by using diffusers. We can choose from various diffuser types—such as large translucent panels or simple DIY options like white bedsheets. To maximize softening effects, we should position the diffuser just a few inches from our subject, aligning it correctly with the sunlight. If we can’t bring a diffuser, utilizing shade is a great alternative; natural diffusion can soften the light beautifully. By waiting for clouds or positioning our subject under trees, we create even lighting that enhances detail without harsh contrasts. This approach elevates our images considerably.
Recommended Products

43" 110CM 5 in 1 Collapsible Multi Disc Light Reflector

5 IN 1 Collapsible Reflector: The 24"x36” (60x90cm) oval reflector has five different effect reflectors with gold, silver, white, black and translucent covers to provide different light effects for your shots.

【5 in 1 Collapsible Reflector 】Total 5 colors interface freely choose: Gold, Silver, Translucent, Black, White for different needs of photography. Godox reflectors with different surfaces will control contrast,add warmth and increase specular highlights.
Reflective Surfaces
Understanding how to work with reflective surfaces can greatly enhance our photography, especially under harsh sunlight. Using polarizing filters is essential; they help reduce unwanted glare from surfaces like water and glass, making our images stand out. By rotating the filter, we can adjust reflection levels and boost color saturation, giving skies a richer blue.
Additionally, incorporating various reflectors can manipulate light. Silver reflectors provide strong reflections, while gold ones add warmth. For softer light, we can opt for white reflectors. Placing reflectors strategically allows us to fill shadows effectively, enhancing detail in shiny subjects. Experimenting with angles and distances is important to achieving the perfect balance of reflective light and surface visibility in our shots.
Recommended Products

Enhance Color & Contrast: CPL filter can enhance the color and contrast, and remove non-metallic reflections such as water, and glass to show the true color, especially used in white cloud and blue sky photography.

Polarization: Linear, Size: 7.8x11.8 inches/ 20x30cm, Thickness: 0.19mm.

Circular polarizer--one of the most popular special-effect filters
Exposure and Contrast Management
Steering through the challenges of exposure and contrast in harsh sunlight can greatly elevate our photography. By utilizing manual exposure control, we can fine-tune settings like ISO and shutter speed to manage bright conditions effectively. For instance, setting our ISO to 100 and starting our shutter speed around 1/500s helps prevent blown highlights. We should also employ exposure compensation techniques, adjusting slightly underexposed to preserve those vital highlights.
Positioning our subjects with their backs to the sun or using diffusers can balance harsh light and reduce extreme contrast. Regularly checking the histogram guarantees our highlight preservation strategies are on track, guiding us to achieve well-exposed images even in challenging sunlight.
Recommended Products

【5-In-1】 A 32’’/80cm 5-in-1 interchangeable reflector (silver/gold/white/black/translucent) lets you bounce light with ease: silver to reflect light without distorting color; gold to warm up, recommended for outdoor shooting; white to soften light and preserve natural color; black to absorb light and creates dark effects; translucent to diffuse light and eliminate shadows.

5-IN-1 PHOTOGRAPHY REFLECTOR:This 5 in 1 photography reflector includes translucent, silver, gold, white and black surfaces to soften light, brighten shadows, add warm tones, create natural fill or reduce unwanted reflections with negative fill
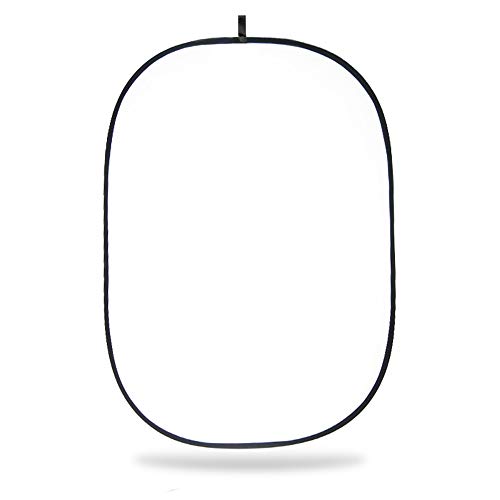
Sunlight Diffuser -- Diffusion panel can be used in a sunny outdoor shoot to minimize harsh shadows.
Compositional Ideas
When we embrace the challenge of composing images in harsh sunlight, we reveal a world of creative possibilities. One powerful technique is shadow play—using strong, sharp shadows to create dramatic effects. By positioning our subjects in partial light pockets, we can explore interesting contrasts that enhance depth and shape.
Let’s not forget texture emphasis; harsh sunlight can bring out intricate details in our subjects and surroundings. Shooting from low angles allows us to capture expansive skies while minimizing unflattering facial details. By incorporating architectural lines and shaded backgrounds, we can unify exposure and maintain a natural feel. Ultimately, experimenting with these compositional ideas opens doors to unique, striking images that capture the essence of our subjects in dynamic ways.
Practical Tips for Outdoor Portraits
Capturing outdoor portraits in harsh sunlight can be a rewarding challenge, as we can leverage the intense light to create striking images. To guarantee subject comfort, we should position our subject with the sun behind or to the side, reducing squinting and harsh shadows. Using sidelight can create beautiful rim light effects while keeping facial features soft. Let’s experiment with creative angles; low-angle shots can add dynamic perspectives. Remember, incorporating natural elements like trees can provide shade and interesting shadow patterns. We should also keep our sessions short or take breaks in shaded areas to maintain our subject’s comfort and natural expressions. With these tips, we can master outdoor portraits even in the brightest conditions.
Recommended Products

Suitable for Portrait Photography: Whether traveling or in daily life, you can take out the 17 inch/45 cm reflector and use your phone or camera to take professional quality pretty portrait photos

Quick-Open Design- Say goodbye to complicated assembly! Our innovative quick-open clamshell reflector requires no tools and sets up effortlessly in just two steps. Designed for solo photographers, this easy-to-assemble reflector saves valuable time during both setup and takedown. Perfect for on-location shoots, it offers a noticeably smoother experience compared to traditional curved reflectors.

【COMPLIMENTARY FUNCTION, WORRY-FREE CREATIVITY】: The 32-inch / 80 cm 5-in-1 reflector with five different reflective surfaces, silver, gold, white, black and translucent, can achieve a variety of light effects to meet the needs of different scenarios. Adjustable light stand folding height of 18.3 inches / 465 mm, maximum height of 63 inches / 1600 mm, minimum height of 18.5 inches / 470 mm, to provide stable support, and its height and angle can be flexibly adjusted, and with the reflector, so that the light and the shooting angle is a perfect match, whether it's indoor portraits, outdoor landscapes, live broadcasts, video creation, can easily cope with.
Frequently Asked Questions
What Time of Day Is Best for Outdoor Portraits?
For outdoor portraits, we think golden hour shines as the best time. The soft light creates beautiful shadow play, enhancing our subjects’ features and providing that warm, flattering glow that makes every shot magnificent.
How Do I Choose the Right Lens for Harsh Sunlight?
Did you know 70% of photographers struggle with lighting? When choosing the right lens, we should consider versatile options like 35mm or 85mm, and explore filter options to enhance our images in harsh sunlight.
Can I Use Flash in Bright Sunlight?
Yes, we can absolutely use flash in bright sunlight! By employing various flash techniques, we enhance our outdoor photography, reducing harsh shadows and adding dimension to our subjects, even in challenging lighting conditions.
What Clothing Colors Work Best for Subjects in Harsh Light?
When choosing clothing colors for harsh light, we recommend neutral tones for a soft look or vibrant colors to create striking contrast. Both options help us maintain clear subjects and enhance overall image quality in bright conditions.
How Do I Avoid Lens Flare While Shooting Outdoors?
To avoid lens flare while shooting outdoors, we should use a lens hood and a polarizing filter. These tools help block stray light, enhancing our images and reducing unwanted artifacts during our outdoor photography sessions.