As an Amazon Associate, we earn from qualifying purchases. Some links may be affiliate links at no extra cost to you. Although our opinions are based on curated research, we haven't used these products. Articles generated with AI.
Installing M.2 NVMe SSD Drives
Installing M.2 NVMe SSD drives can greatly enhance your system’s performance. First, we should conduct a thorough data backup and check compatibility with our motherboard. Once that’s done, we locate the M.2 slot, insert the SSD at a 30-degree angle, and secure it properly. To manage heat, we might consider adding a heatsink. Finally, we’ll configure the BIOS to prioritize our new SSD. By following these steps, we enhance our system’s speed and efficiency—let’s explore more tips for an ideal setup!
Key Takeaways
- Back up your data and check compatibility with your motherboard before installing the M.2 NVMe SSD.
- Locate the M.2 slot on your motherboard and remove any obstructions or heatsinks.
- Insert the SSD at a 30-degree angle, ensuring it aligns correctly with the connector pins.
- Implement thermal management by using heatsinks and thermal pads for effective cooling.
- Access the BIOS to configure settings and prioritize the NVMe SSD as the primary boot device.
Preparing for M.2 NVMe SSD Installation
You may be interested


Before diving into the installation of our new M.2 NVMe SSD, it’s essential to set the stage properly. First, we need to focus on data backup. We should save important files to external storage devices or cloud services to prevent data loss during installation. Using tools like Seagate’s DiscWizard can help transfer data safely from old drives. Next, let’s conduct a compatibility check. We must consult our motherboard’s documentation to guarantee it supports M.2 NVMe SSDs. We should also verify the SSD key type matches the slot and check for any necessary BIOS or UEFI updates. By preparing with these steps, we can guarantee a smooth installation experience without unexpected interruptions in productivity.
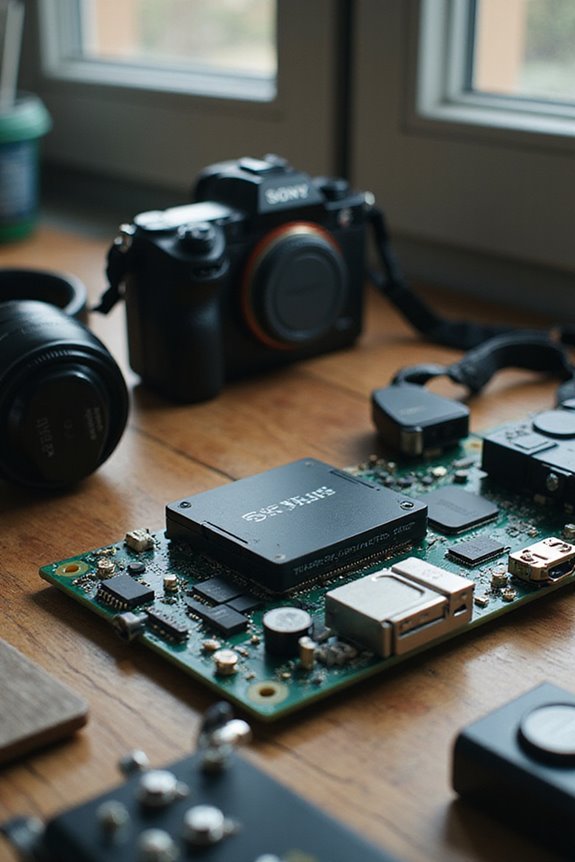
Locating and Accessing the M.2 Slot
Locating the M.2 slot on our motherboard is the next step in the installation process. Typically, M.2 slots are found directly on the motherboard layout, often near the CPU socket or PCIe slots. It’s important to consult our motherboard manual, as some models may feature multiple M.2 slots with varying connectivity types. If our M.2 slot is partially obscured by a GPU or other components, we’ll need to temporarily remove those for access. Additionally, we should check for heatsinks covering the M.2 slot—these will require unscrewing before we can proceed. Finally, let’s confirm we have the right mounting standoff and screws ready for a secure installation.
Inserting the M.2 NVMe SSD
Inserting the M.2 NVMe SSD is an important step that can greatly enhance our system’s performance. First, we need to verify there are no M.2 compatibility issues by confirming our motherboard supports the SSD type we’re using. Let’s insert the SSD at a 30-degree angle, aligning it with the connector pins. It’s vital to avoid forcing the SSD upside down, as it only fits one way. Once in place, we gently push the SSD down until it’s flat against the motherboard. Remember to align the mounting hole with the screw hole, securing it with light force to avoid damage. Following these SSD installation tips will help us achieve a successful installation, setting the stage for improved system performance.

[PS5 NVMe Heatsink] – Patented heat sink for ✅1st PlayStation 5 (modeled CFI-1xxx) internal NVMe SSD. (Not for ❌Slim or ❌Pro). It features a heat pipe and a huge solid aluminum heatsink. The high performance comes from the numerous cooling fins and the delicate utilization of air circulation sucked by PS5 main cooling fan. The streamlined profile is a snag fit with the middle frame of PS5 chassis. The heatsink is the ultimate cooling solution to the heat management of extreme Gen4 gaming SSD

Complete PS5 Cooling & Dust-Proof Solution - All-in-one upgrade kit includes M.2 SSD heatsink cover, 4x fan dust filters, silicone port plugs, brush, screwdriver, and cloth — designed to keep your PS5 Pro/Slim cool and clean

The heatsink fins offer a solution to down the component's temps. This type of heatsink is suitable for cooling M.2 2280 SSD, for SM951, for SM961, for 950PRO, for XP941, etc.
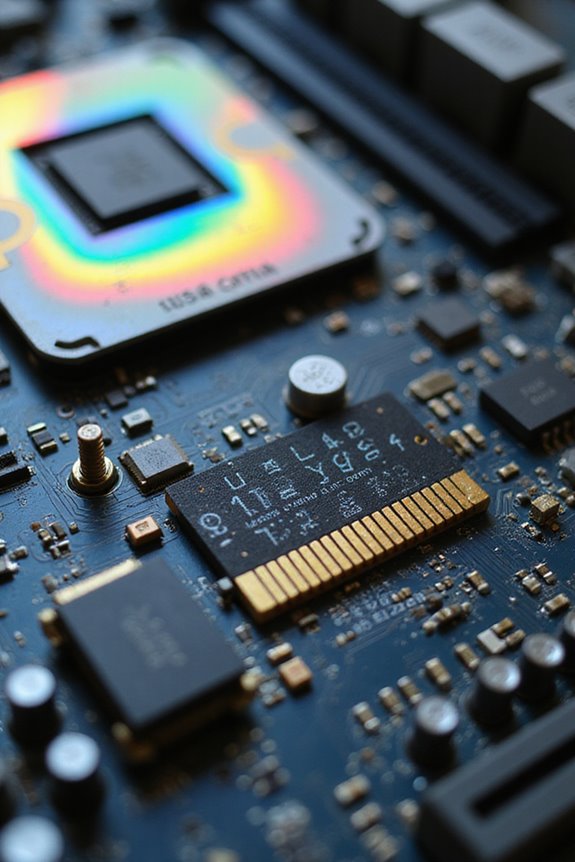
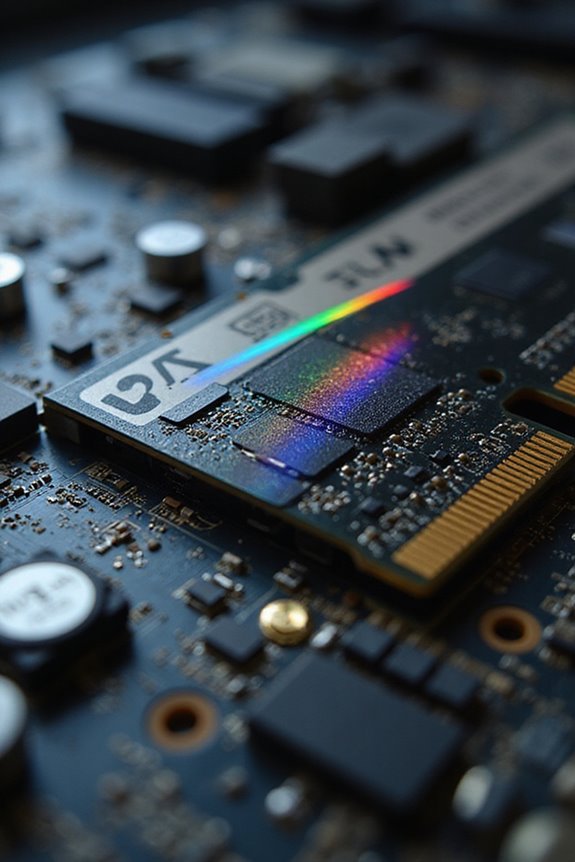
Cooling and Heatsink Installation
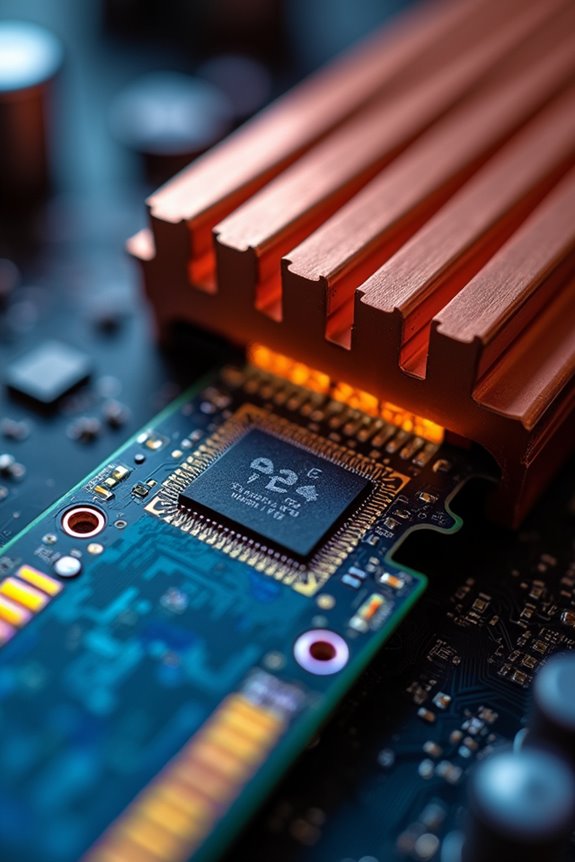
Cooling and heatsink installation is essential for maintaining the performance and longevity of our M.2 NVMe SSDs. These drives can heat up quickly, often exceeding 70°C under load, which leads to thermal throttling and reduced speeds. To guarantee efficient thermal management, we can employ various cooling solutions such as passive heatsinks and thermal pads.
Passive heatsinks, made from aluminum or copper, enhance heat dissipation by increasing surface area. If our motherboard has a pre-installed heatsink, it’s a great start, but aftermarket options can provide even better cooling. When applying thermal pads, we should verify firm contact with the SSD for peak heat transfer. By adequately cooling our SSDs, we can maintain peak performance and enhance their lifespan.

Next-gen PCIe Gen4 technology optimized for top-tier gaming (not intended for NAS or server environments)

Extreme Gen4 Storage Performance: A PCIe Gen4 x4 controller delivers up to 7,000MB/sec sequential read and 6,500MB/sec sequential write speeds, for phenomenal read, write, and response times.
TRANFORM YOUR PC: Insane speeds up to 7,300MB/s (1TB - 4TB models) deliver top-tier performance with ridiculously short load times for your gaming PC or workstation — for the elite experience you’ve been waiting for.
BIOS Configuration and System Setup

When we’re ready to set up our M.2 NVMe SSDs, configuring the BIOS is an important step that can greatly impact performance. First, we’ll access the BIOS during boot, usually by pressing keys like F2 or Delete. Through BIOS navigation, let’s locate the storage configuration section to enable PCIe x4 mode, maximizing our SSD’s speed. It’s vital to adjust our boot settings, making sure the NVMe SSD is prioritized as the primary boot device, especially when using UEFI mode. Additionally, we should check for any firmware updates to enhance compatibility with our NVMe drive and prevent potential detection issues. Keeping our BIOS updated makes certain we’re fully utilizing the capabilities of our new SSD.

Ideal for laptops & small form factor PCs

SPEED UP PROJECTS. Accelerate your AI-enabled workflow with PCIe Gen 4.0 speeds up to 7,100 MB/s,[2] (1TB-2TB[1] models) 30% faster than our prior generation.[3]

You Will Get: M.2*2.5mm SSD screws x 50PCS, magnetic screwdriver x 1PCS.Supports M.2 PCIe hard drives and Asus NVMe/NGFF motherboards.
Formatting and Initializing the SSD
Formatting and initializing our M.2 NVMe SSD is a crucial step that sets the stage for peak performance. Before we plunge into SSD formatting, let’s make sure we’ve backed up any important files. We should also check that the SSD is unallocated and ready for partition management.
For Windows users, we can use Disk Management or File Explorer to format. Just right-click the SSD, select “Format,” and choose a file system like NTFS for internal use or exFAT for external compatibility. If we’re feeling adventurous, Command Prompt offers advanced options. After formatting, we’ll assign a drive letter and volume label for easy access. Once complete, let’s verify everything’s functioning smoothly before plunging into using our new drive.
Verifying SSD Detection
Verifying SSD detection is vital to confirm our new M.2 NVMe drive is recognized and ready for use. First, we need to check our BIOS settings; enabling PCIe support or NVMe mode is essential for recognition. If our SSD isn’t showing up, we should also confirm that the M.2 slot is enabled and properly configured. Additionally, conducting SSD compatibility checks can help us avoid potential issues with our motherboard. If problems persist, firmware updates for both the SSD and motherboard can resolve compatibility issues. Finally, testing the SSD in different slots or systems may uncover hardware problems. By following these steps, we ascertain our SSD is detected and functioning efficiently, paving the way for a smooth installation process.
Installing Operating System on the SSD
Installing an operating system on our new M.2 NVMe SSD is an important step that can greatly enhance our computer’s performance. To start, we need to boot from the Windows installation media, whether it’s a USB drive or a disc. During the setup, we’ll follow the installation prompts and select our SSD as the target.
It’s imperative to guarantee OS compatibility with our chosen version of Windows. We can create necessary partitions on the SSD during this process. Once installed, we should finalize the setup by installing all drivers and updates. This prepares our system to take full advantage of the SSD’s speed, assuring a smooth and efficient computing experience right from the start.
Optimizing SSD Performance
To truly access the potential of our M.2 NVMe SSD, we need to evaluate several key factors that can greatly enhance its performance. First, let’s confirm our BIOS settings are optimized, enabling PCIe x4 mode and selecting the M.2 port closest to the CPU. This reduces latency and maximizes bandwidth. Regular firmware updates and enabling the TRIM command will help maintain SSD performance and extend its lifespan. We should also keep our SSD storage below 50% capacity to avoid slowdowns. Finally, performance benchmarking tools can help us monitor throughput and identify bottlenecks, confirming we’re getting the most out of our drives. By following these steps, we can optimize our SSD experience effectively.
Troubleshooting Installation Issues
When we encounter issues during the installation of our M.2 NVMe SSD, it can feel frustrating, especially if we’re excited to boost our system’s performance. First, let’s check hardware compatibility; verify that the SSD fits the correct M.2 slot and that we’ve used the right key type. If our SSD isn’t recognized, reseating it or checking BIOS settings often helps. Remember to verify that all internal connections are secure—displaced SATA cables can also affect booting. For persistent problems, updating the motherboard BIOS might resolve detection issues. Finally, don’t forget to install necessary drivers and verify proper partitioning of the SSD. Following these troubleshooting tips can help us achieve a successful installation.
Frequently Asked Questions
Can I Use an M.2 SATA SSD in an NVME Slot?
We often face M.2 compatibility issues, wondering if we can use an M.2 SATA SSD in an NVMe slot. While they share form factors, the differences between SATA and NVMe can lead to complications.
What Is the Lifespan of an M.2 NVME SSD?
The lifespan of an M.2 NVMe SSD typically ranges from 5 to 7 years, depending on SSD endurance and write cycles. We should monitor performance to guarantee ideal longevity and avoid unexpected failures over time.
Are There Any Specific Brands Recommended for M.2 NVME SSDS?
Did you know that Samsung 970 consistently ranks among the fastest SSDs? For M.2 NVMe drives, we recommend Samsung, Western Digital, Essential P5, and Kingston A2000 for their impressive performance and reliability across various needs.
How Do I Know if My Motherboard Supports NVME SSDS?
To determine if our motherboard supports NVMe SSDs, we should perform an M.2 compatibility check and focus on NVMe slot identification, ensuring the key type and length align with our desired SSD specifications.
What Tools Do I Need for M.2 NVME SSD Installation?
When we tackle M.2 NVMe SSD installation, we’ll need a #1 Phillips screwdriver and possibly a T10 Torx driver. Don’t forget thermal pads for heat management; they’re essential for ideal performance and longevity.